Great things come from great collaboration. And that's what we've been focused on, side by side with Airkit, a US-based company that automates your customer experiences, lowering costs and speeding up service.
From automated onboarding, self-service scheduling, digital deflection, churn prevention, and more, Airkit elevates any Customer Experience, by automating digital CX, reducing contact center costs, increasing CSAT (Customer Satisfaction), and accelerating resolution times.
Besides working on a total revamp of their website, Airkit brought us another challenge — creating a new feature where their customers could understand how much they could save using Airkit digital’ self-services.
And that's when the idea for a CX Assessment calculator was born, a calculator that tells you precisely how much you can save by using a digital self-service instead of a regular call center.
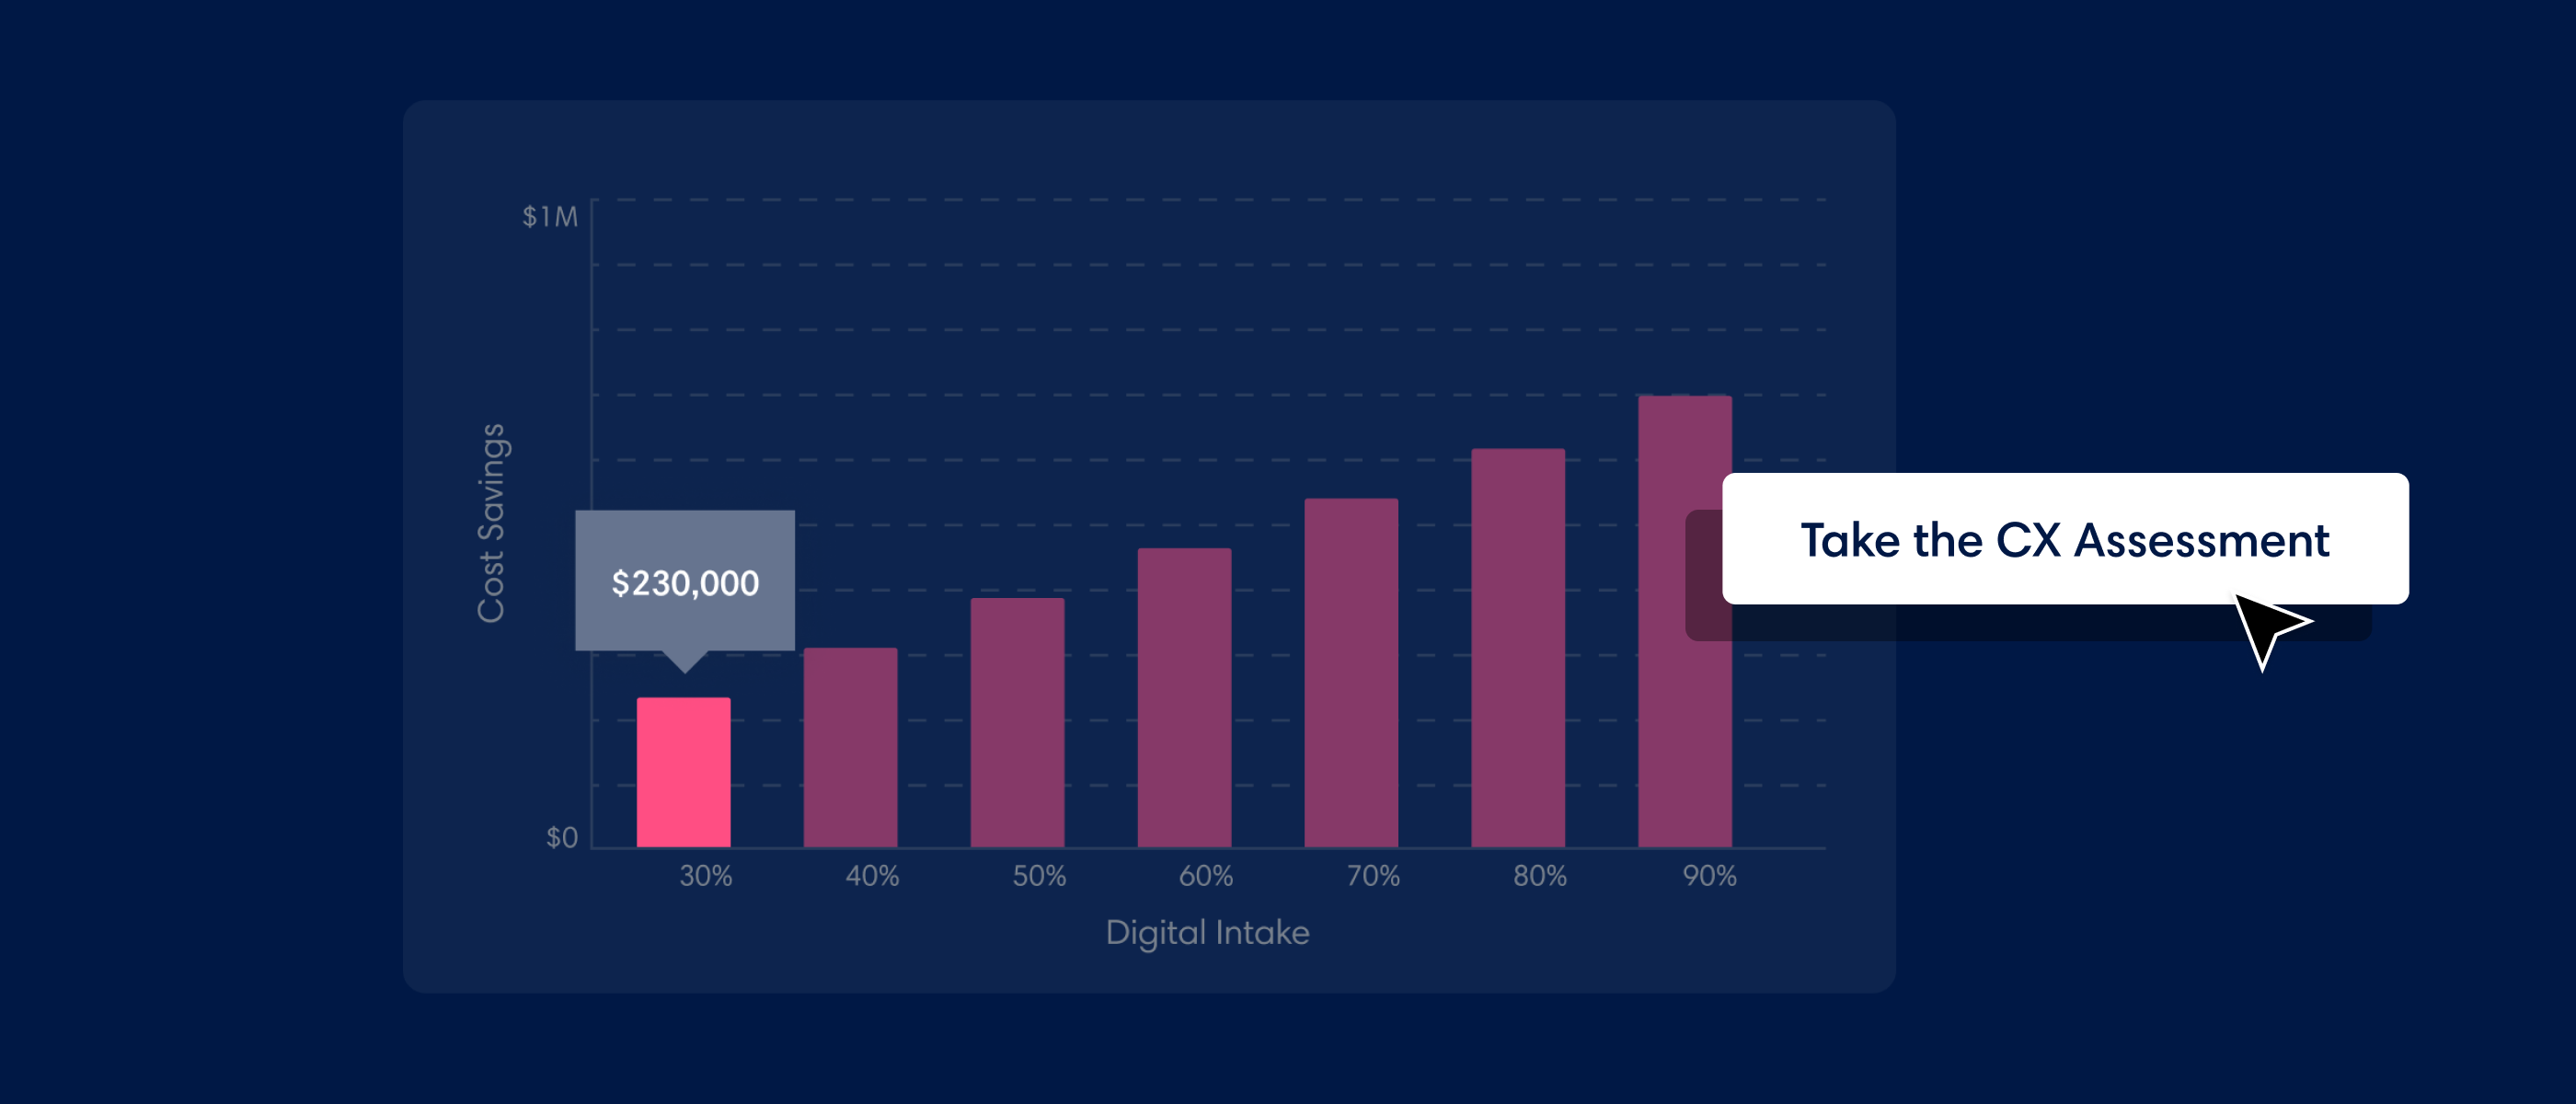
Meet CX Assessment, a calculator for saving big...
But the advantages of this calculator go way beyond what meets the eye.
It saves big by showing how potential clients can spend less with automated digital CX, but it also saves time.
The CX Assessment has also become a game-changer for the Airkit Sales team. Previously they had this calculator in an excel spreadsheet. Today, with the new calculator, the Sales Team can show how much the potential client will save with Airkit on-call or generate results in PDF format to share asynchronously.
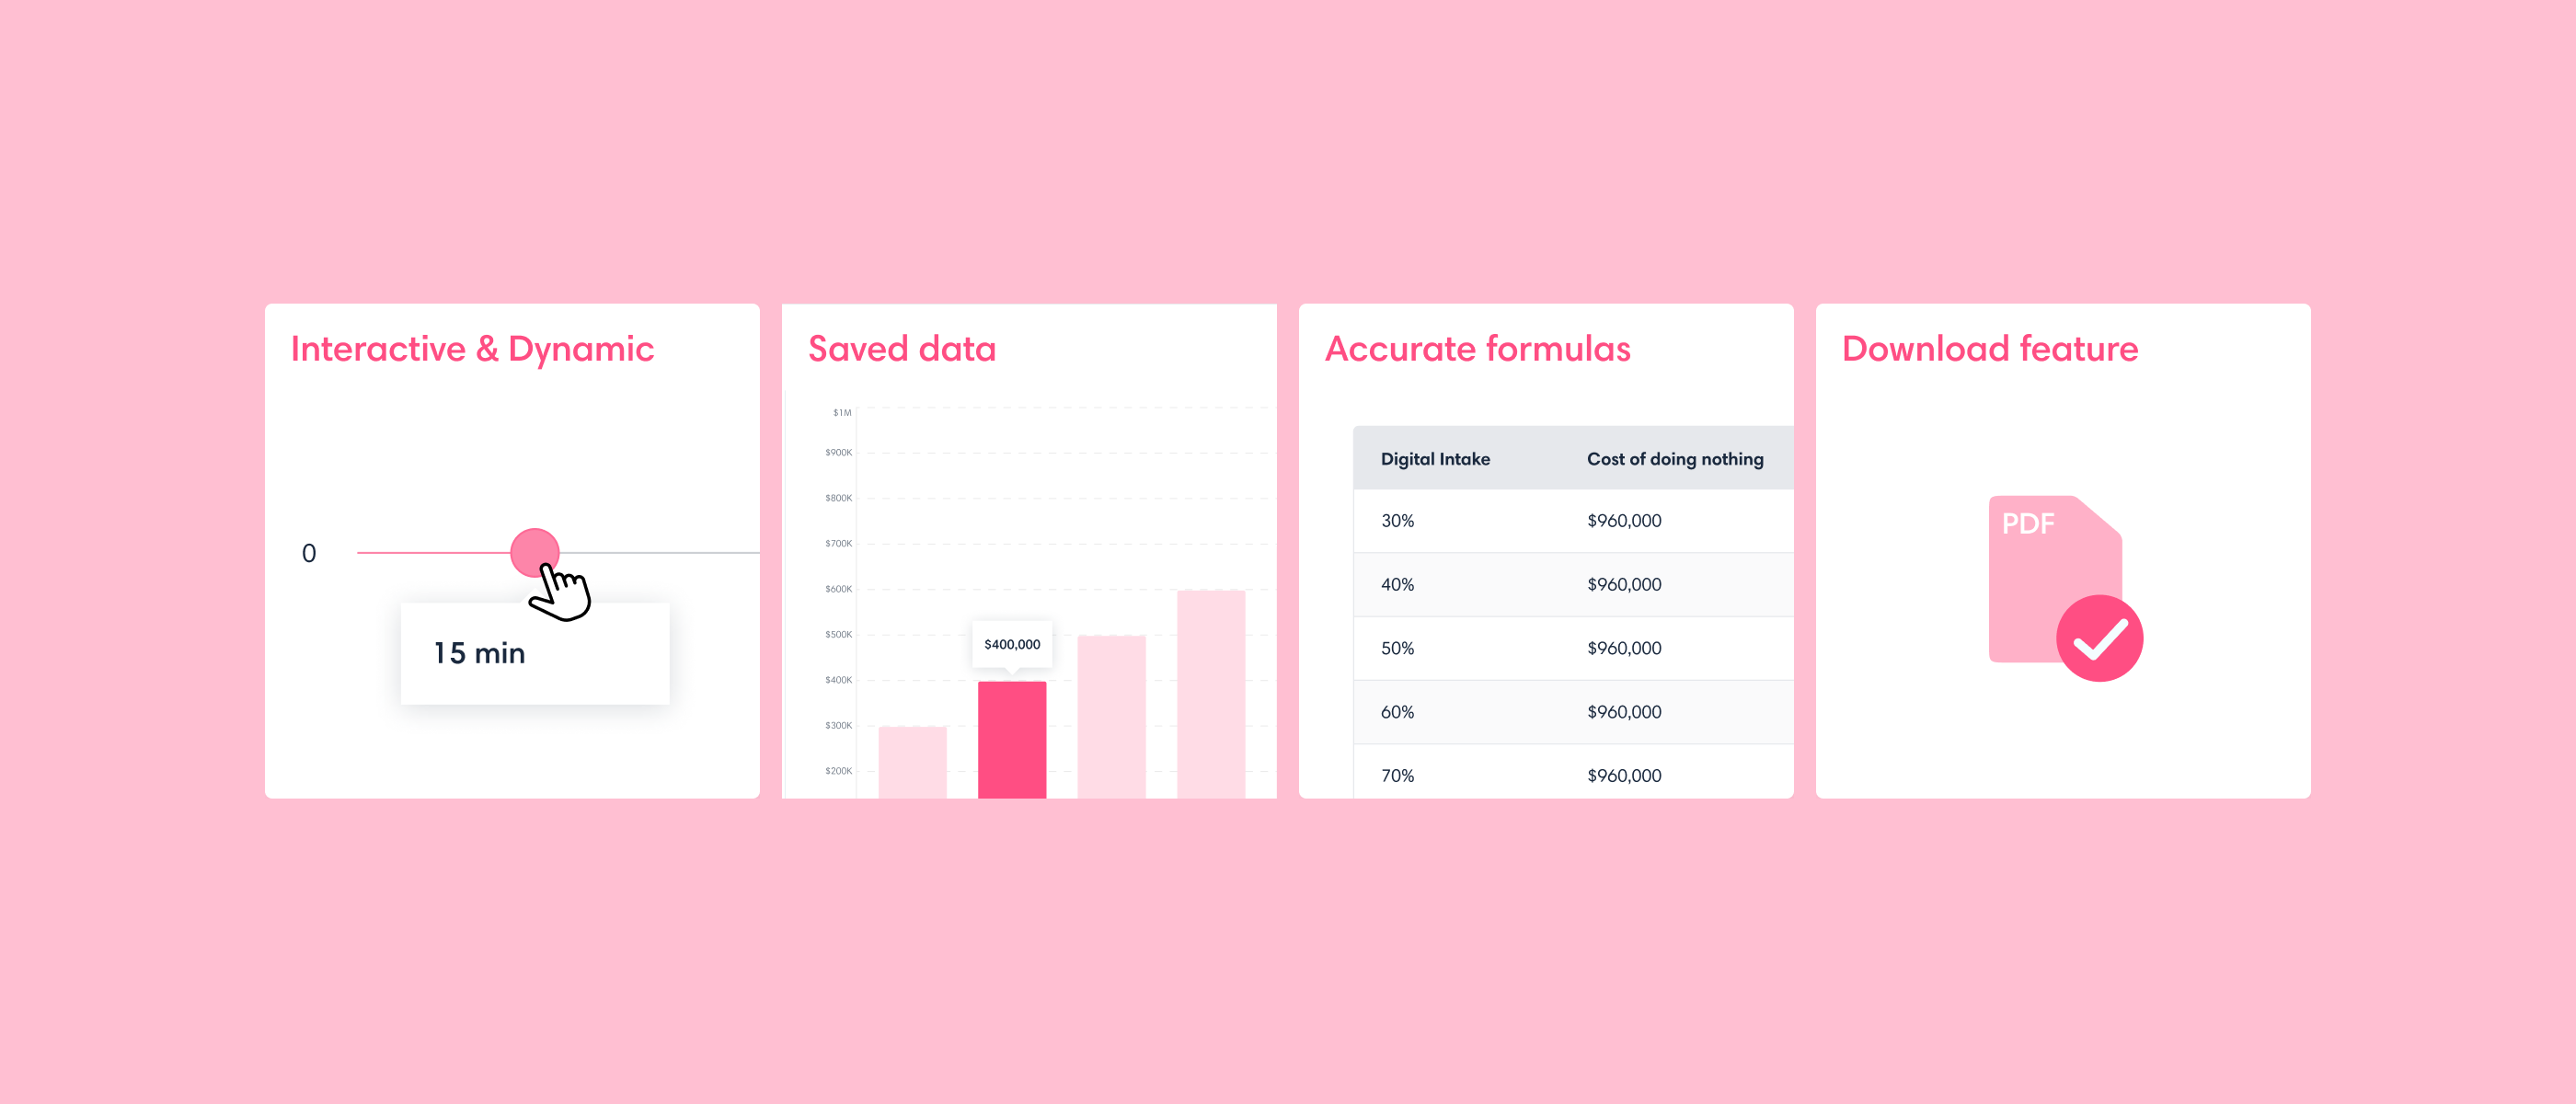
The calculator's must-haves
Before going into the details of this journey, let's first take a look at the goals that Airkit shared with us to create the calculator:
- Make it interactive and dynamic to better engage with visitors;
- Save data so that the results can be shared and reaccessed. Plus, allow to bulk export them from the back-office.
- Guarantee that the data conversion formulas are correctly translated to the new calculator;
- Have a PDF Download feature so users can download their results easily.
Creating a dynamic and interactive calculator was a challenge. But the real challenge was to create a dynamic and interactive calculator within boundaries — an existing infrastructure used on the rest of the website.
Adapting to an existing Infrastructure
Considering Airkit's and Pixelmatters’ previous infrastructure decisions, their Marketing Website was using both Gatsby and WordPress; the latter was used for back-office to manage the website's content.
So you might be asking...
How did you use Gatsby and WordPress to create a dynamic calculator?
We were already using WordPress as a headless CMS with the official Gatsby Source WordPress plugin plus WordPress WPGraphQL and Advanced Custom Fields plugins for building the website. This was an advantage to creating a new Custom Field Group and Page Template in WordPress to save the basic calculator data and then fetch it in Gatsby via GraphQL to generate the static calculator page.
For the Result page, Pixelmatters couldn't follow the same flow. The user would have to wait for Gatsby to build the page statically, resulting in poor UX since the build times can go from a couple of minutes to 15 minutes in Netlify, the hosting service initially used on the CX Assessment.
Pixelmatters decided to fetch the saved result data, which was saved on WordPress in a Custom Post Type, on the client-side (before Gatsby support for server-side rendering, which we can take advantage of now). Then, we used it to dynamically load the sections and components which needed it. This way, the user gets the page right away without waiting.
And that’s where creativity came in. Or should we say, our awesome Creative Front-End Engineers? The team's main decision was how a dynamic calculator could be created with Gatsby, a static site generator, even if it allows dynamic content.
Recapping, Pixelmatters defined the following calculator's core development foundations:
- Front-End development: Pixelmatters used Gatsby. It's where the page template, sections, and components are.
a) We also developed a Netlify Function that generates a PDF from the result page using Puppeteer and sends it to the user. - Back-End development: we used WordPress — here's all the base data for the calculator (fixed variables, benchmark data, stepping, etc.) on the calculator page using Custom Fields.
a) Pixelmatters also save the results in a Custom Post Type, keeping the answers’ value and not the Marketo answers, so all the results are automatically anonymous. - CRM: by keeping Airkit’s CRM, Marketo, Pixelmatters fetched the form set in the Back-End for CX Assessment. When the user submits it, we add the result ID and URL saved in the Back-End.
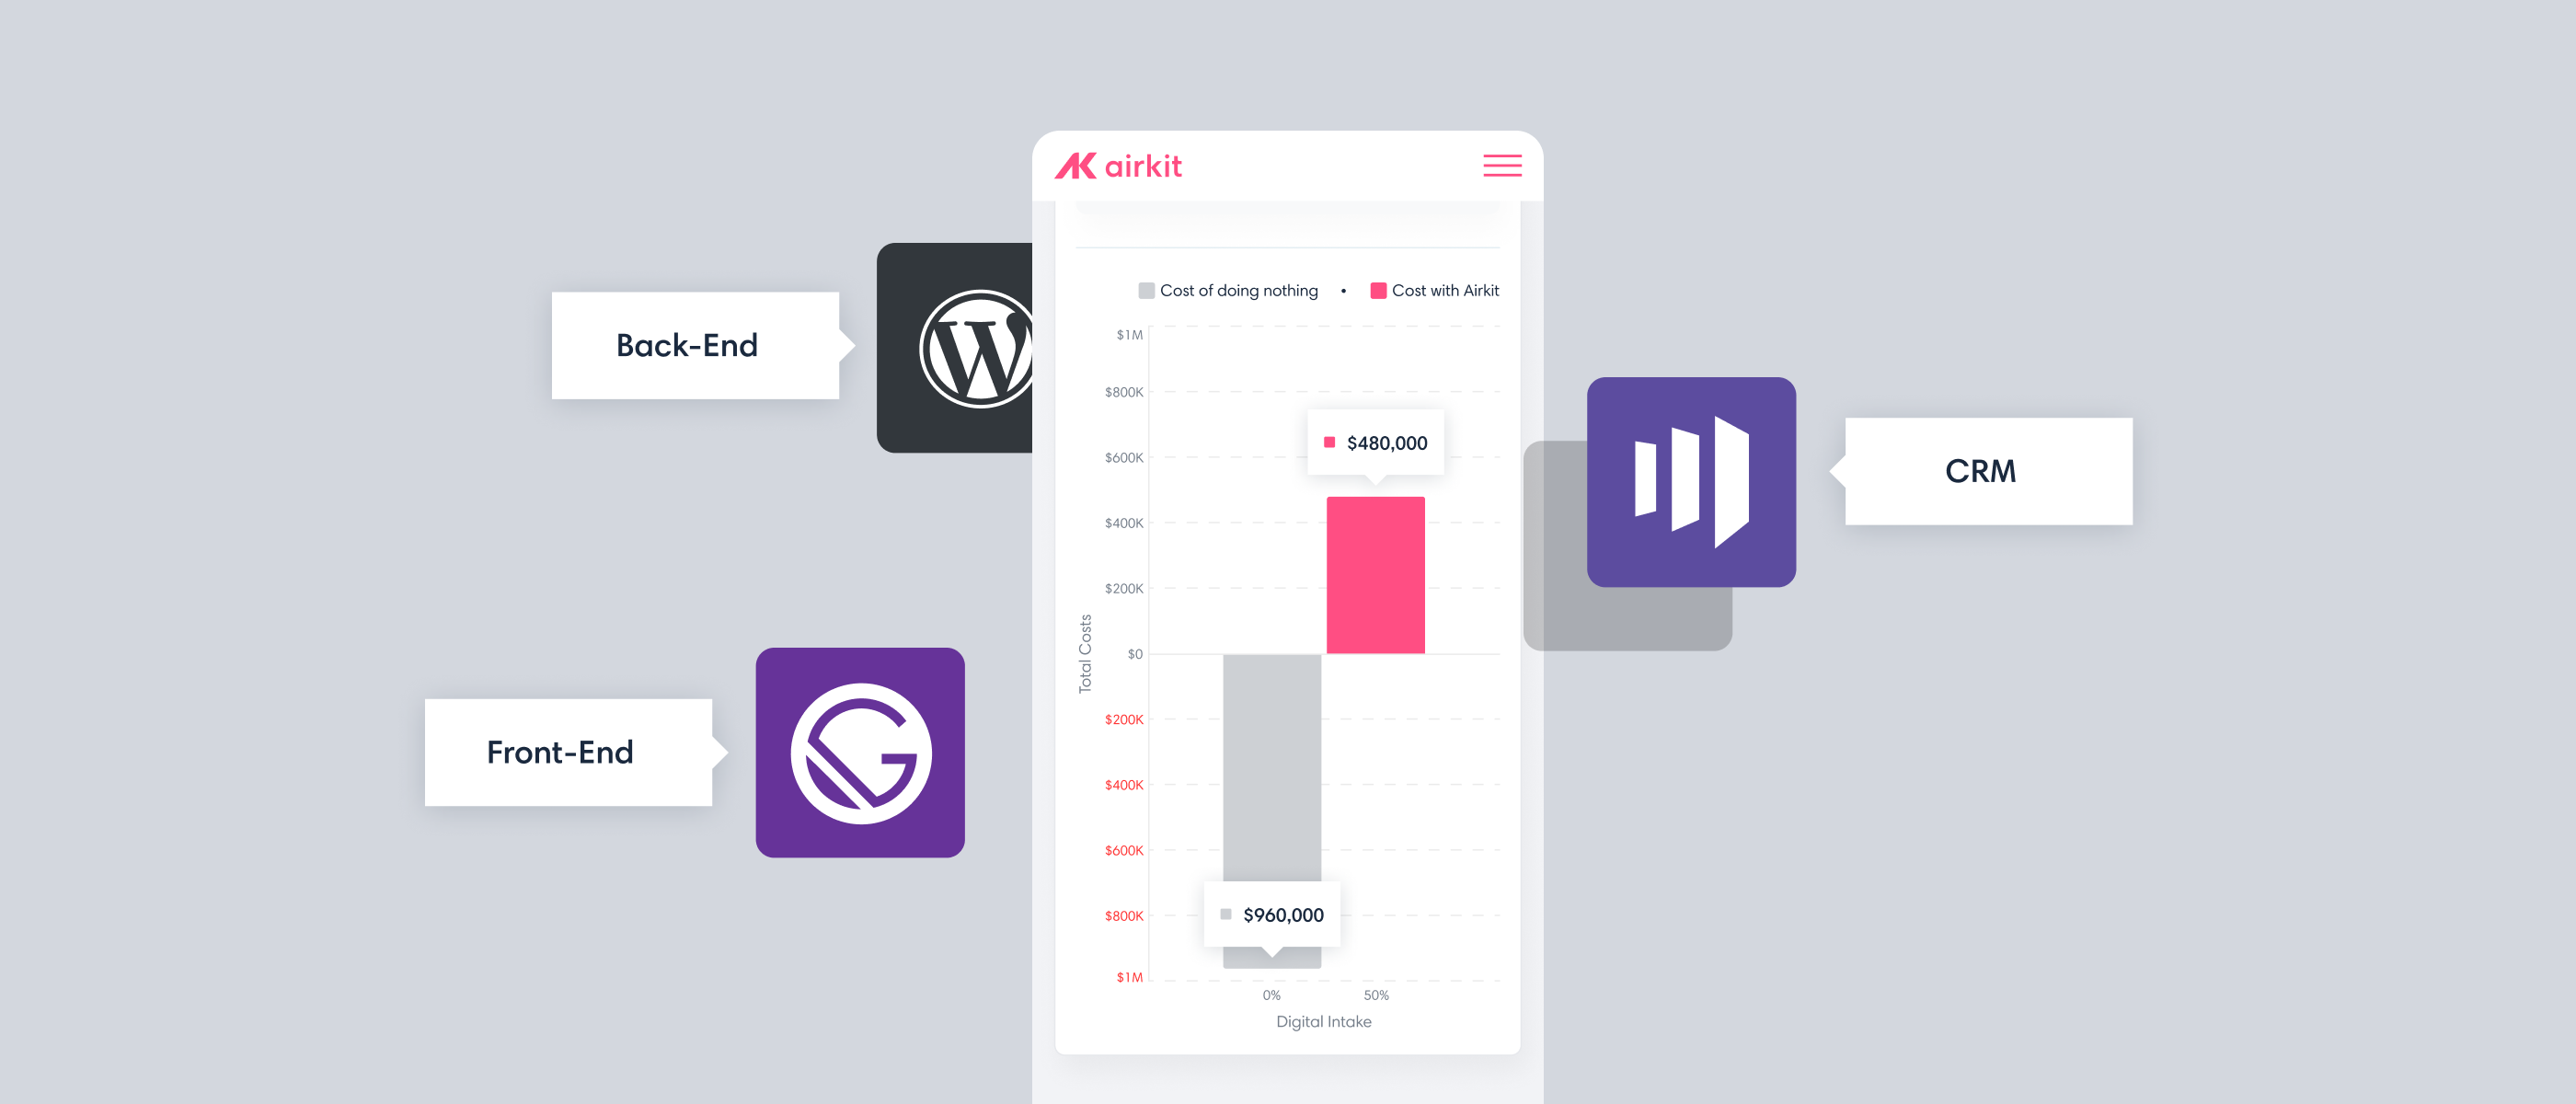
Here's also a list of the libraries Pixelmatters used:
- React Chart.JS for graph visualizations;
- RC Slider for the slider input on the form;
- React Number Format to format all numbers consistently;
- Puppeteer and Chrome AWS Lambda for the PDF generation feature.
Key Technical Challenges
It's now time to share our challenges and learnings on building an interactive and fully-customized calculator.
The PDF Download Feature
Building the PDF Download feature was one of the most relevant accomplishments on the CX Assessment.
At first, Pixelmatters tried to use Gatsby 4 server-side rendering feature. However, we realized that its compatibility with Netlify hosting is still in beta, and it converts the getServerData function to Netlify Functions. So, we decided to use Netlify Functions directly to reduce the potential conversion bugs.
Besides this, there was also a time limit for builds (15 minutes) in Netlify. It's possible to raise it to 30 minutes by talking with support and the Netlify Function timeout (if it doesn't run in 10 seconds or less, it will return an error).
The latter was particularly impactful since our PDF Generation could take longer than 10 seconds if the result page was too complex. To fix this, Pixelmatters asked support to raise the limit to 30 seconds and simplified our print version of the Results page to reduce the PDF Generation time further.
Netlify Function also limits the function size itself — it needs to be less than 50 MB, which comes from AWS Lambda (what Netlify uses behind-the-scenes). So, instead of using the full version of Puppeteer (that has a full Chrome, around 282 MB), Pixelmatters used a custom version made for AWS Lambda (that kept it at around 47 MB).
But, even then, it didn't work since the Chromium binary keeps growing — Pixelmatters had to find and use an older version of Chrome AWS Lambda that had the binary small enough for the whole function to be below 50 MB.
Calculator-type posts
Pixelmatters found another challenge to enable the Front-End to save data directly to our back-end. We developed a new REST route in WordPress to create calculator-type posts. But how?
We created a new user — to generate an APP Key added in Environment variables of the front-end to authenticate the POST request. And also a custom role that was only authorized to create CX Assessment type posts.
WordPress API Authentication is a Base Authorization type with the following structure" username:password” encoded in Base64, that we added in our environment variables.
Pixelmatters also added a new REST route using “register_rest_route” WP function and then a permission callback that checked if the authenticated user (sent in the POST request) could “publish_cx_assessments”.
Checking if the calculations were right ✅
Imagine how many calculations and formulas go into generating a calculator. Unit testing allowed the team to guarantee that the calculations were correct and accurate at every request.
Conclusion
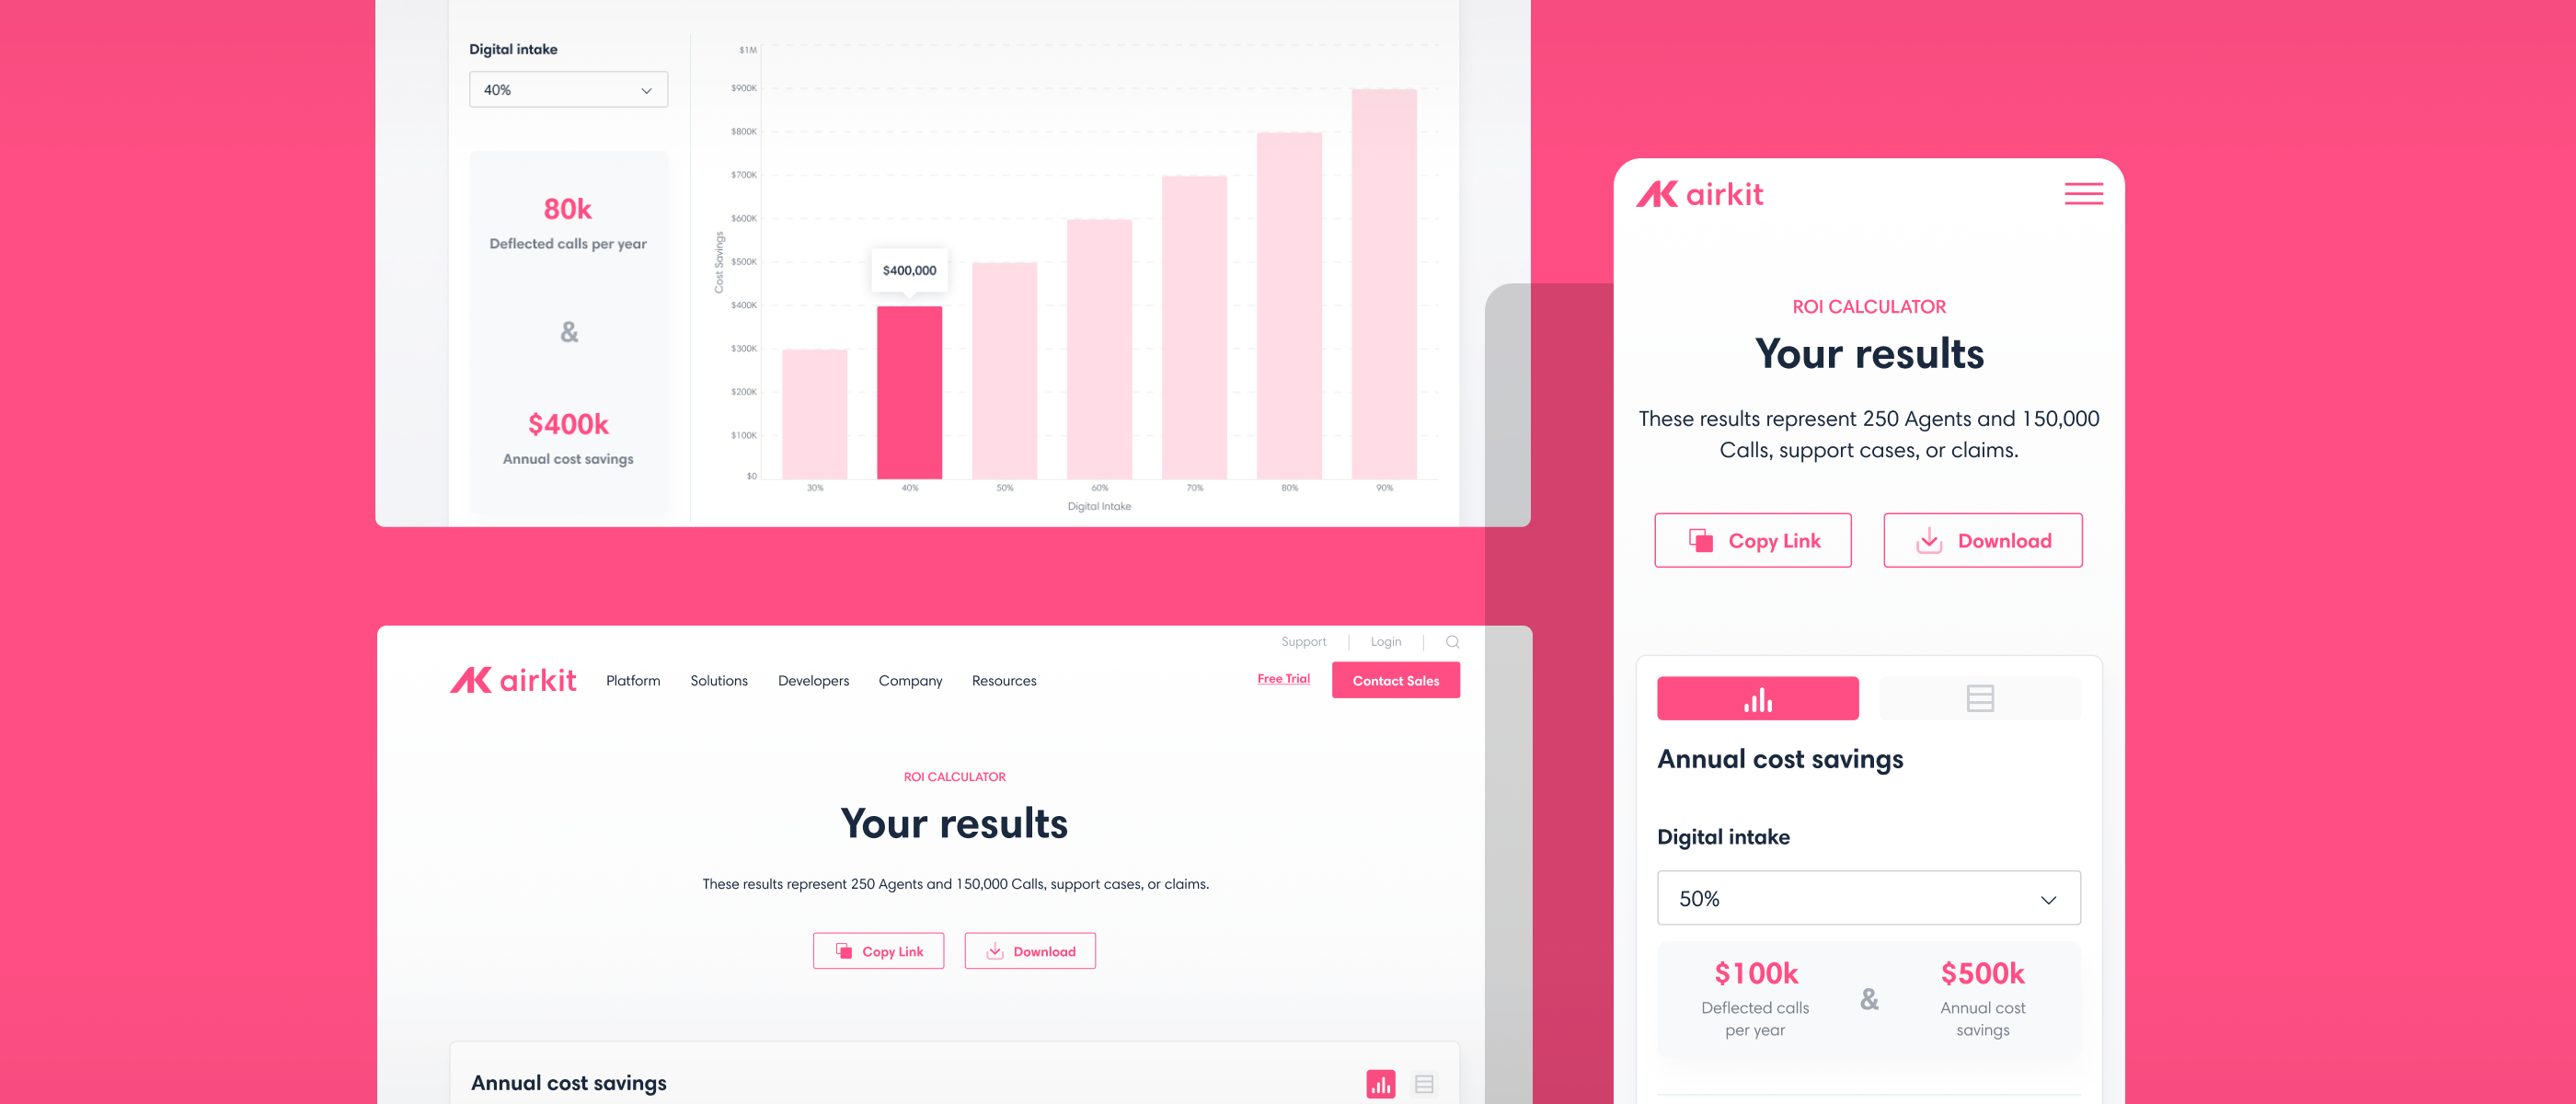
Airkit and Pixelmatters created a wholly new customized interactive ROI calculator, a resource dedicated to helping companies lower their costs. On the other hand, it also changed how their Sales Team operates for the better.
And there is more to come from this collab. Stay tuned!




.png)


